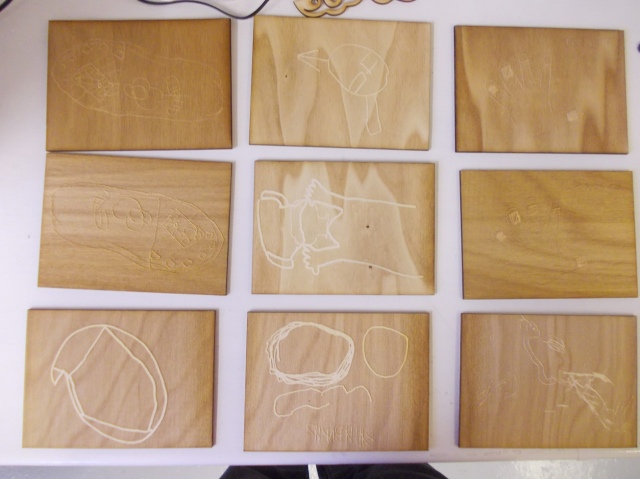
Each of our co-researchers from Tower Hamlets was given the task of drawing their favourite (or preferred) object from the enlightenment gallery at the British Museum. The drawing was to be kept simple, as we wanted to engrave each one onto wood and then use this engraving for the front, of what will eventually be, their sensory box. Each of the completed sensory boxes will eventually be placed alongside the real object in the enlightenment gallery for our (one day) exhibition in January. the process for engraving is described below.
Each of the images was first scanned and saved as a greyscale image. This is one of them (drawn by Ryan):
The images were cropped to 15cm x 11cm and set at a resolution of 300 DPI, as we wanted them to be approximately the same size as a postcard. The images need to be converted to 1-bit bitmaps so that they are compatible with the laser cutter software. This was easy to do in photoshop: first change image mode to greyscale, then set the mode as bitmap. Then you can save the image as a 1-bit bitmap. We also inverted each of the images to get:
The reason for doing this is that the laser cutter will remove the background and leave the sketched lines as a relief. We prefer this way of engraving as the result is much more tactile.
Here’s the machine which we used to engrave and cut out the pictures:
It’s a LaserScript LS3060 with a 60W tube. It’ll cut 8mm acrylic or plywood, possibly even 10mm. For the engravings (and the box which is decribed below), we used either 3mm birch or 3mm poplar plywood. The poplar is slightly softer wood so requires a lower power setting. However, we didn’t know this at the time, so the poplar engravings appear darker than those cut from birch.
The picture were merged into a single large bitmap which is approximately the same size as the cutting area of the laser cutter. This allowed us to engrave and cut a whole batch of images, rather than one at a time. It took about 1.5 hours to complete each set of engraving from a sheet of plywood, and the results are shown below:
The second set of engravings used poplar plywood, and as you can see they are darker:
We also created a very simple box which has the same length and width as the images so that an image can be attached to the front of the box. The one below has dimensions 11cm x 15cm x 3cm and is just about deep enough to include some simple electronics, including a speaker, MP3 player and battery:
When assembled, the box looks like this (this one has an engraved image attached to the top):


Pingback: Tower Project at the RIX centre Session Eleven 15.10.14 – Sensory Objects